Navigating New Eden: Difference between revisions
Gatide Huren (talk | contribs) |
Gatide Huren (talk | contribs) |
||
| Line 17: | Line 17: | ||
=In-system navigation and maneuvering= | =In-system navigation and maneuvering= | ||
See [[In-system_navigation_and_maneuvering|this page]] for information. | |||
See [[ | |||
In | |||
| | |||
=Inter-system navigation in New Eden= | =Inter-system navigation in New Eden= | ||
Revision as of 02:33, 8 November 2023
Please participate in our Exploration Adopt-A-Page Initiative and Adopt this Page! (note that sections 5 to 9 are still adoptable)
Sections 5 to 9:
Page adopted by Your name here! till three months from now 
This article is a stub. You are very welcome to expand it. Please follow our Wiki Editing Guidelines.
| The Explorer's Handbook |
|---|
Like so much else in EVE Online, movement and navigation are complex. There are three separate layers, each with their own mechanisms and operating at very different scales:
- The finest-granularity control is on what is known as the grid. Here is where fighting, hacking, and mining are controlled and determined.
- The next level up is that of the star system, where players can warp between the system's star, celestials, and, structures and sites.
- Finally, the player can navigate between star systems using gates and wormholes. New Eden is made up of roughly 5000 systems connected by static gates and a further 2600 connected by dynamic wormholes.
The following sections deal with each in turn. Successful gameplay requires understanding and mastery of each.
On-grid maneuvering
See this page.
See this page for information.
Basic geography of New Eden
New Eden consists of roughly 7800 star systems, with over 5400 connected by permanent stargates (forming so-called K-space) and the remaining systems by transient wormholes (known as J-space).
K-space is divided up into 64 interconnected regions with a 65th region (Pochven) isolated from the rest. Regions are further subdivided into constellations, but these have little impact on gameplay. 23 regions are part of empire space, divided up between the four empires and CONCORD, and are the game's high-sec and low-sec spaces. The remaining 41 regions form null-sec and are player controlled. Pochven's 27 systems are also interconnected by gates, but the rest of K-space is only reachable via wormholes and filaments.
J-space systems are divided up into various wormhole classes, C1 to C6 being the main classes. The mechanics of navigating these are nearly identical with only the four Drifter wormholes having wormholes that appear directly on the Overview when in connected K-space systems. All other wormholes need to be scanned down as cosmic signatures.
See Sections 5 to 9 for further descriptions of the different spaces.
Jumping from system to system
There are multiple mechanisms for jumping between star systems:
Star gates are the main mechanism to jump between different systems in K-space, i.e. outside of wormhole/J-space. All ships in-game and even capsules can jump through star gates. One needs to be within 2500 m of a gate to jump through it and on reaching the other side, the jumping ship is placed around 12 km from the gate, with a 60s cloak and invulnerability timer. Given the correct distance, the jump will occur except when
- (Rarely) a server error occurs -- the player is informed that "traffic control" is preventing the jump. Generally a second attempt at the jump command will result in a successful jump.
- The player has a 60s weapons timer.
Wormholes are the main mechanism to jump between different systems in J-space/wormhole space. These are temporary connections, lasting no more than a day, covered in more detail below in the section on wormholes. One needs to be with 5000 m of a wormhole to jump through it and on reaching the other side, the jumping ship is placed roughly 5 km from the wormhole, with a 60s cloak and invulnerability timer. There are no aggression timers, but there is a polarization timer, allowing no more than two jumps through a wormhole inside any four-minute interval. The polarization timer applies to the capsule, not the ship -- so reshipping does not change the polarization timer state.
Jump filaments provide a means of jumping large distances within K-space, but the destination system is always randomly determined. All jump filaments have a cool-down timer, preventing use of another filament within 15 minutes of the first. Most filaments can transport multiple ships, up to the number listed in their name. This means that you need to be in a fleet to use these - right-click at the center of your capacitor indicator and select "Pilot" and then "Form Fleet" to place your character in a fleet with just yourself.
The table below shows the different jump filaments available.
Table 7: Jump filaments. ## will be the number of ships that can jump with a given filament. Values can include 1, 5, 15, and 25.
| Filament | Destination |
|---|---|
Noise-## 'Needlejack' Filament  |
Transports up to yy ships from K-space into a quiet system randomly selected in null sec. |
Signal-## 'Needlejack' Filament  |
Transports up to yy ships from K-space into a busy system randomly selected in null sec. |
Border-## 'Pochven' Filament  |
Transports up to yy ships from K-space into a randomly selected border system in Pochven. |
Cladistic-## 'Krai zzz' Filament  |
Transports up to yy ships from K-space into a randomly selected system in Pochven controlled by the zzz clade. |
Home-## 'Pochven' Filament  |
Transports up to yy ships from K-space into a randomly selected home system in Pochven. |
Internal-## 'Pochven' Filament  |
Transports up to yy ships from K-space into a randomly selected internal system in Pochven |
Glorification-## 'Devana' Filament  |
Transports up to yy ships from Pochven into a randomly selected Triglavian Minor Victory system in either low-sec or high-sec space. |
Proximity-## 'Extraction' Filament  |
Transports up to yy ships from Pochven into a randomly selected low-sec or high-sec system within 2.5 light-years of the starting Pochven system. |
Use of filaments is a powerful gameplay tool - some would say too powerful. The tactics of using filaments is covered in more detail in sections discussing entering null sec and Pochven. Note that travel filaments cannot be used in wormhole systems.
Ansible jump gates are the player-installed and owned equivalent of star gates. They can only be installed in null sec space and one ansible jump gate connect to another, generally many systems away on the "normal" star-gate map. Access may be controlled and tolls may be charged.
Interstellar shipcasters are faction warfare structures installed in one system per faction:
- Mehatoor (Amarr)
- Onnamon (Caldari)
- Intaki (Gallente)
- Amo (Minmatar)
These structures work in one direction only, from the ship caster in the direction of up to three beacons, potentially in different systems. The beacons are player-installed and can be attacked and destroyed by players from opposing factions. The end destination from any given ship caster rotates between the different beacons installed. Access to the shipcasters is restricted to players signed up to the corresponding faction. Camping the beacons by opposing players is possible.
Cynos and Jump Drives are ship-based inter-system jumping mechanisms. Capitals, Jump Freighters and Black Ops Battleships are the only ship hulls that have the jump drive capability. Jumps are made to either deployable cynosural (or cyno for short) beacons or to cyno fields lit by ships such as Ventures (for the Rorqual) or Covert Ops (for Black Ops Battleships).
Titans, Black Ops Battleships and Rorquals can bring other ships with them through bridging of fleet members. Fleet members need to manually activate the bridge.
Black Ops Battleships and Rorquals can also bring other ships with them using conduits where up to 30 qualifying ships within a 10km radius are automatically jumped to the cyno.
There are numerous tools to aid in inter-system navigation in EVE Online:
The in-game map provides a wealth of statistics that can inform route planning. The most useful are
- Ship kills in the last hour.
- The average number of pilots in space over the last 30 minutes.
- The average number of pilots docked up, over the last 30 minutes.
Once a route has been set in-game, the in-game map will highlight it, making it easy to check for conditions along the route. Importantly, it provides a more up-to-date and accurate view of these statistics than any of the external tools.
DOTLAN is an external tool that presents a flat 2D map of K-space. The flat, per-region presentation is much more useful for understanding the topology of EVE's K-space than the confusing 3-D presentation in the in-game map. Just like the in-game map, it can overlay with various statistics by pulling from an external API (application programming interface) called ESI (EVE Swagger Interface). Unlike the in-game map, these statistics are based off delayed data, perhaps up to a one-hour delay for some kills. The statistics include:
- Ship and pod kills in the last hour or last 24 hours.
- Jumps per hour or last 24 hours.
- NPC kills in the last hour or the last 24 hours.
It also provides a wealth of other (static) data on individual K-space systems, covering mining resources, stations, sun type, etc. It also has route mapping capabilities, presenting the number of system kills on the selected route.
For J-space navigation, the player and/or their corporation has to build their own maps. Two tools frequently used for mapping wormhole connections are Tripwire and Pathfinder. Each has their own strengths, but it should be noted that Thera mapping work is done in conjunction with Tripwire.
For navigation to/from Pochven via wormholes rather than filaments, consider EVE Metro. Its route mapper considers scanned Pochven wormhole connection along with Signal Cartel's Thera mampping data. The routing function also accepts non-Pochven end-points. All Signal Cartel members have free access on login.
There are a number of dedicated threat assessment tools:
Eve Gatecamp Check provides a combined routing and presentation of kill reports, with a focus on gate camps. In particular, it not only presents the number of recent kills in a system, it also check to see if they were at gates and whether or not smartbombs and/or Heavy Interdiction Cruisers were used. All Signal Cartel members have free access, on login, to advanced features.
Killboard can also be queried for recent kills per system. It gives a lot of detail on the location of the kills, the pilots and ships involved, and the long-term kill statistics as a function of the day of the week or the hour. Note that some gate-camp players will go to considerable length to keep their kills off zKillboard, so as to not tip off any other players that may go through their camp.
Allison is the Signal Cartel AI co-pilot. If given access to your character's location, it provides an easy interface to other tools such as zKillboard and DOTLAN. Other navigation capabilities in Allison are explored here - these include mapping and routing functions, using any wormhole data you've gathered while traveling through J-space.
Planning and setting your route
Basic in-game mechanisms
If one right-clicks on any system name, celestial name or station name nearly anywhere in-game two or three routing options appear in the drop-down menu:
- Set Destination - for setting that location as the first destination in the routing tool.
- Add Waypoint - for adding that location as an extra waypoint or final destination in the routing tool.
- Avoid/Do Not Avoid (for systems only) - for adding or removing a star system from the routing tool's avoidance list.
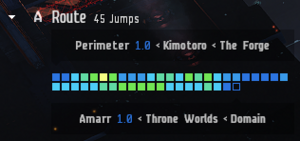
The resulting route selected by the routing tool is shown under the left-hand side on-screen user interface item with an A symbol. The system listed just over the route is the next system to jump to, while the final destination is given on the bottom. The same route is also highlighted in the in-game New Eden system map.
To adjust the results of the routing, right-click on the A symbol. Various options are presented for adjusting the desired route, but the most commonly used are "Prefer Safer" and "Prefer Shorter":
"Prefer Safer" attempts to keep the route in high-sec space as much as possible, but the algorithm can be made more or less aggressive in doing so by setting the "Security penalty" slider. For the example shown in Figure 1, the 45-jump high-sec-only route is selected with the default penalty of 50. Set the slider to 20 and the algorithm gives a higher weighting to shorter routes and selects the 11-jump route via Abhazon -- a low-sec system notorious for gate camps!
"Prefer Shorter" will always select the shortest route, irrespective of the security status en route.
Assessing traffic flows, identifying choke points
If a pilot understands the main traffic flows and main areas of activity in a region then the risks of any given route become easier to determine.
For example, consider the Great Wildlands. Dotlan's view of the number of jumps per system in the last 24 hours will show that most jumps are on the western and eastern north-south corridors, with particular hot-spots around two of the systems with NPC stations, M-M3DB and E02-IK. Switching to the view of the player ship kills in the last 24-hours will generally show the most kills in choke-point systems such as N-RAEL or M9U-75 near the inter-region gateways or along the pipe from NIH-02 to CRXA-Y, with most of the region's NPC stations.
Thera and Turnur
Two systems with a large number of wormholes to K-space are Thera and Turnur. Thera, a large J-space system, always has wormholes to roughly a dozen random systems in K-space. Turnur, in Metropolis' low-sec space, has 3 wormholes to random systems in null-sec space, 2 to low-sec space and one to high-sec.
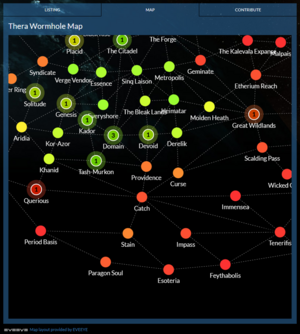
The connectivity to null-sec space is particularly useful, bypassing as they do any gate camps at the entry systems to many null-sec regions. Combined with Eve-Scout's public, dynamic Thera map and bookmarks, the Thera route is a well-used method for taking short-cuts across the map of New Eden. At the time of writing, there are plans to extend Thera mapping to Turnur. See the dedicated Wiki section for the latest guides to Thera mapping.
Using Thera and Turnur is not without risk. Because of that enhanced connectivity, one or two major low-sec alliances use Turnur as a staging system for raids. Null-sec holes are frequently collapsed through rolling. Thera often has camps stationed at K-space wormholes and indeed any connections close to Jita. However, the large size of both systems, makes it difficult for any one group to lock down all wormholes or (in the case of Turnur) stargates.
The Pochven Express
Gate camps permanently bubbled using mobile warp disruptors are the main impediment to travel around null-sec and in particular crossing over to low-sec or high-sec space. The danger is particularly acute for ships without covert-ops cloaking. The combination of one Pochven-in-bound filament and one Pochven-out-bound filament is a powerful tool for bypassing such null-sec gate camps. This technique is known as "the Pochven Express".
The steps are as follows:
- Use any Pochven in-bound filament to jump from null-sec to Pochven.
- Create a safe and cloak up at it. If no cloaking device is fitted and online, create additional in-system safes.
- Stay cloaked or bounce around between safes for 15 minutes until the filament use timer expires.
- Use any Pochven out-bound filament to jump to high-sec or low-sec.
- Travel to your destination by conventional means.
While this scheme works with any in-bound/out-bound pair of Pochven filaments, one can influence where one jumps to on the out-bound filament through the correct selection of the in-bound filament combined with a Proximity out-bound filament. Proximity filaments always jump to a K-space system geographically close to the Pochven system from which the jump is made. To select the correct in-bound filament to improve the chances of a Proximity-filament jump landing close to your final destination, consider the following in conjunction with this map:
- If your target is Caldari space, select a Border filament -- all six Border systems were from Caldari space.
- If your target is Gallente space, select a "Krai Veles" filament -- four of the nine systems in the Krai Veles constellation were from Gallente space.
- If your target is Amarr space, select a "Krai Svarog" filament -- all four systems formally from Amarr are in the Krai Svarog constellation.
By way of contrast, Glorification Devana filaments will jump to any low-sec or high-sec minor Triglavian system and these are scattered between the four empires. This can leave the player with a long, and sometimes hazardous journey, to their final destination.
Other points to note:
- Pochven space is dangerous. Local is delayed, just like wormhole-space. Bubbles are allowed! So jumping from system to system in Pochven is not advised unless fitted with a covert ops cloak.
- Glorification Devana filaments can be purchased in Pochven itself, from any NPC station for 10k ISK. Docking up in an NPC station is an alternative for waiting out the 15-minute filament timer, but is much more risky than simply cloaking up.
Wormhole selection and statics
Wormhole destinations are highly random, but since different wormhole classes have different static wormhole classes, the statistics for a given wormhole system are not evenly spread. For information on what static wormhole types each class has, please see this Eve University Wiki page. Some informal studies on the probability of a static type occurring, given the current wormhole class, have been reported on Reddit.
However, consider a different question: When traveling through J-space, often a player has scanned down and identified the wormholes in the system they are currently in. No wormhole to their desired destination is available. Which wormhole should they choose to jump into next to maximize their chances of finding the right connection in that next wormhole?
Table 8 below attempts to answer this by identifying the system types with the highest probability of a static wormhole to the desired destination. The assumption is that availability of these statics then skews the probability distribution towards or against finding any wormhole with the desired connection destination.
Table 8: Tactics for wormhole selection
| Desired destination | Good wormhole selection | Poor wormhole selection |
|---|---|---|
| High-sec | C1 or C2 | C4, C5 or C6 |
| Low-sec | C3 | C4, C5 or C6 |
| Null-sec | C3 | C4, C5 or C6 |
| C1 | High-sec | C5 or C6 |
| C2 | High-sec, C4 | C5 or C6 |
| C3 | Low-sec, C4 | None |
| C4 | None | K-space, C1 or C3 |
| C5 | C4 or C6 | K-space, C1 or C3 |
| C6 | C5 | K-space, C1, C2 or C3 |
Ice filaments
During the Winter Nexus events, ice-storm filaments are made available to players as site drops, NPC drops, login-rewards and track rewards. The high-sec version of those filaments jump a player or group of players to a metaliminal storm in high-sec space. The idea is to provide a fast means to travel quickly to the event sites.
However, these filaments work from anywhere in K-space and thus can be used during the event as a low-risk means of jumping directly to high-sec space.
Hisec
The security of a system is an indication of roughly how dangerous that system may be, displayed as a decimal value between 1.0 and -1.0, Systems with a security rating of between 1.0 and 0.5 are considered High-Sec. In High-Sec space CONCORD will police PVP actions taken by Capsuleers, responses are delayed depending on the security rating of the system in question, nearly instant in 1.0 space and nearly 20 seconds in 0.5 space. While this is intended to be an indication of danger, the only truly safe place in New Eden is docked, so remember to practice caution regardless of this value.
CONCORD will only police specific actions called Criminal-Level Offenses, which give a Capsuleer the Criminal Status, CONCORD ships and nearby sentry guns will fire on Criminal Capsuleers.
The following is a list of offenses that provide the Criminal status in High-Sec
- Attacking another Capsuleer that is not a Legal Target
- Attacking CONCORD
- Attacking another Capsuleers loot
- Remote repairing NPC or Capsuleer Criminal ships
An important distinction here is the "Legal" target, which makes a world of difference to how safe High-Sec actually is for members of Signal Cartel. A Criminal or Suspect Capsuleer is a legal target, and CONCORD will not intervene if a Capsuleer aggresses against them. War is another reason that a target would be considered legal, members of warring Corporations are considered Legal Targets to each other. If a Legal Target is attacked they gain the Limited Engagement status which allows them to defend themselves against their aggressor without interference by CONCORD. Another source of the Limited Engagement status is when two Capsuleers accept a Duel Request, allowing them to fight without interference.
While these are the CONCORD laws and standards, members of Signal Cartel are expected to uphold The Credo and remain neutral in our actions. Just because CONCORD will not respond to an action, doesn't mean it is in line with The Credo.
Remember that CONCORD is only present as a deterrent to criminal activity in High-Sec and will not protect you. Other Capsuleer Corps have often declared war on Signal Cartel and are free to attack our ships regardless of status, including in High-Sec space, combined with low returns from high-sec exploration sites this means that High-Sec space provides much less in the way of exploration opportunities than Null-Sec or J-Space.
Lowsec
The security of a system is an indication of roughly how dangerous that system may be, displayed as a decimal value between 1.0 and -1.0, Systems with a security rating of between 0.4 and 0.1 are considered Low-Sec. In Lowsec, like Hisec, there are CONCORD sentry guns on stations and stargates, however, CONCORD will not react to hostile PVP actions, though the sentry guns will attack provoking players and such actions will still cause a loss of Security Status. Low-Sec is just as dangerous as Hi-sec but for different reasons.
While Lowsec is far less populated than Hisec people there will often specifically hunt you down, without any fear of concord showing up. Lowsec systems that act as chokepoints bordering Hisec or Nullsec are often used to Gate Camp, resulting in many ship losses when moving in and out of Lowsec. The safest method in and out of Lowsec for an experienced explorer is through Wormhole space, however, this requires its own set of skills to be done effectively and safely.
The lower population of Lowsec means that worthwhile sites in empty systems are far more common, likewise, the sites themselves provide much better payouts than Hisec variants, though they often tend to have cans that are harder to hack. It is important to learn how to use D-Scan and Local to protect yourself, and to practice risk assessment at all times; determining when it's "Safe Enough", when to cut your losses or quit while you're ahead. The greatest tool would be experience and making mistakes, you'll likely never forget the situations that got you blown up and you'll learn from them. Try to use cheaper, disposable, ships at first to get used to the feeling and to mitigate any anxiety.
Faction Warfare Space
Faction Warfare as a gameplay mechanic does not really affect Signaleers, as being in Signal Cartel precludes us from participating. Faction Warfare takes place in Low-Sec space, specifically in two regional War Zones, each of which is being contested by two NPC factions: The Amarr-Minmatar war zone, and the Caldari-Gallente war zone. Players aid their chosen faction in contesting these systems for faction standings and loyalty points, and count as being at war with their opposing faction, allowing them to legally attack each other in High-Sec space.
Nullsec
The security of a system is an indication of roughly how dangerous that system may be, displayed as a decimal value between 1.0 and -1.0, Systems with a security rating of between 0.3 and 0.0 are considered Null-Sec. In Null-Sec, unlike in Hi-Sec or Low-Sec, there is no Concord presence or acts that provide the criminal or suspicious status.
No ship or module restrictions apply in Null Space and situational awareness is key to surviving Null-Sec. Keep an eye out for gate camps and fleets of hunters, and remain mobile or cloaked when possible. Always trust your gut when you feel things are a little too unsafe and simply move on. Try not to fly anything you couldn't afford to lose in Null and practice effective risk management when it comes to deciding when to return to a station.
On top of the usual safe travel technics, you'll need extra measures specifically in Null-Sec. For instance, gate camps will use "bubbles". Mobile Warp Disruptors, Warp Disrupt Probes, and Warp Disruption Field Generator will be deployed at specific gates and will require specific defensive modules (nullification module) or tactics (warp to the gate at an angle, not from another gate). The locals know their space well and will have scouts to warn them in advance while you are still two or three jumps away, many PVP corps present in Null Space have standing fleets intended to chase out or down trespassers.
Despite all these risks, Null-Sec offers the most relative freedom and possible rewards of known space for exploration, and despite how overwhelming these risks may sound correct mitigation can nearly guarantee survival.
Choosing a Region
Assuming you are exploring to find hacking sites you will need a quiet area with profitable sites and an easy way in / easy way out. Different regions of Null are occupied by specific Pirate Factions, each of which has unique loot tables for their data and relic sites. The average value of each faction in order of most to least isk per site is as follows: Sansha's Nation, Gurista's Pirates, Blood Raider Covenant, Angel Cartel, Serpentis Corporation. Though this can change based on the current economy. You can use various sites like EvEye and DotLan maps to find out which regions of null are inhabited by your chosen faction, but remember that the more valuable of a faction you choose the more competition you are likely to find.
Null Sec is divided into Claimable and NPC regions, in Claimable Null you will find capsuleer corps and stations being run, from which there are most likely standing fleets and you are unlikely to be allowed to dock, while in NPC Null you will find NPC Stations that are generally safe to dock at so long as you do not have poor standing with the pirate faction of said region.
Entering Null sec
The first issue of Null-Sec is simply finding a reliable method of accessing it. The various alliances and factions - even small gangs of independant pilots - will set gate camps at the choke points. Even if it is possible to reach Null space using the regular travel routes, there are much safer ways to do so.
- Filaments:
Filaments are fairly cheap consumable items found in data-sites, the two kinds useful for this purpose are "Noise" and "Signal". To use a filament you must be in a fleet (Even if it is simply by yourself), have your ship safety setting set to at least Partial Safety, and not have any log-out timers. You must also be a certain distance from structures, simply warp at 100 to a nearby celestial object or use a safe point. When attempting to use a Filament you may find it a tad finicky, so long as you meet these requirements simply try a couple more times and it should work.
These filaments are named as "(Noise/Signal)-# 'Needlejack' Filament" the # determines how many nearby fleet ships the filament is capable of transporting, while the "Noise" vs "Signal" determines how the filament targets systems, With Noise being seemingly random space and Signal targeting systems with high "Activity"
There is, however, a catch to filaments: while theoretically Noise filaments will go to a random null system, the exact methodology of its targeting is unknown. Many have claimed to find patterns in where it will put you in short periods of time, or repeated locations being used, and there have been some claims of gate camps or hunters that specifically use this knowledge to hunt down filamenters. Though there isn't much in the way of hard evidence on the subject, Reddit post studying the Needlejacks use leads to this conclusion. On the other hand, there are a lot of examples of successful pilots roaming in Null Sec using filaments. This tactic should probably not be discarded lightly.
- Using Thera
Thera is a unique system and offers a lot of opportunities to travel across New Eden. Signal Cartel - and more specifically the Eve Scout program - are heavily related to Thera and any Signaleer should probably get familiar with it. Suitonia, a famous Eve Online PVPer, made a good introductory video here. Regarding the access to Null Sec, Thera is definitely a valid option, especially if you have decided to live out of Signal Cartel's Thera Station. A famous Signaleer explained how to use Thera to access Null Sec.
This tactic is not without risks either, thanks to the Eve Scout program, there is a public list of currently opened wormholes in Thera and their destination. This is very useful to the Eve Online community, however, the trade-off is that any Null sec group could be waiting for you on arrival as they can check the current wormholes state on the Eve Scout Website, they may be waiting two or three jumps away. Remember that Null-Sec Capsuleers are very familiar with each of their limited territories, while you must become familiar as you move and plan.
If you would like to use this method you should also look at the Thera section of this page.
- Using random wormholes
This tactic could be qualified as a "brute force" approach. To summarize, you scan a random wormhole close to where you are, and enter it. You enter another wormhole and continue following the chain until you find a suitable null connection, or dead end.
The advantage of this method is that no one should be waiting for you, it's unlikely your specific chain has been mapped out and camped as long as it doesn't border a high-traffic system. However because of the unpredictable nature of these connections the resulting Null connection, should it even exist, may be sub-standard. There may be high traffic, or a poor yield NPC faction, or perhaps even some sort of conflict. You may scan during hours without finding a valid Null sec exit point or continuously find dead ends.
If you would like to use this method you should also look at the Wormholes section of this page.
Pochven
Wormhole Space/J-Space
Wormhole Space, also known as J-Space or Anoikis Space, is a unique collection of around 2600 systems that contain no stargates making them only accessible via Wormhole. J-Space Systems are named with a J- followed by 6 numbers and do not contain NPC Stations. High, Low, and Null Sec Space, when in reference to J-Space, is called Known Space or K-Space.
The Local Chat in Wormhole Space is different from K-Space as it does not show Capsuleers present in the system unless they are actively using it. D-Scan still functions as normal, allowing you to see uncloaked Capsuleers, but any wormhole could contain any number of cloaked capsuleers without your knowledge, thus it is imperative that you remain alert in Wormhole Space. Many use the one-click one-scan rule, that for every time you click something you should D-Scan. Thankfully this also means that cloaked Signaleers at safe spots are nearly impossible to find, or even notice for that matter, thus you are most vulnerable while caching, hacking a site, or leaving the wormhole.
Once mastered, however, Wormhole Space is particularly useful for explorers and contains the majority of Signal Cartel content such as The ESRC Program, Thera Scanning, and even The Anoikis Division. Other than Signal Cartel services, Wormhole Space is uniquely valuable to explorers as it contains a higher density of sites than Known Space, has random paths that continuously change, making Capsuleer Density low, allows for better hunter avoidance, and provides more valuable exploration sites.
Finding Wormholes
Wormholes spawn randomly in any system and decay within a couple of days, making their various connections and locations exceptionally random, logging out in a Wormhole is both a good way to lose your path back to known space and to find new systems in the chain. Wormholes can spawn anywhere and can lead to anywhere, from J-Space to K-Space, K-Space to K-Space, J-Space to J-Space, and more.
Wormholes spawn appear as Signatures just like Data and Relic sites, most wormholes can be easily scanned down by a starter exploration fit, and all wormholes can be entered by frigates, some can have size restrictions beyond this. Once a wormhole is scanned down it can be warped to and entered. Once you have warped to a Wormhole you are most likely going to want to identify it. How long it will last, if other ships have traveled through it, where it will go, and if your ship will fit through it this is the kind of information you'll be wanting.
There are a variety of methods of identifying wormholes, from simply inspecting the details of them to looking at their color and shape. Though it can seem daunting at first, As you gain experience with wormholes you'll find them more and more simple to identify. Make sure to D-scan near a chosen wormhole to ensure it isn't being camped, and remain alert whilst identifying it, camped wormholes are rare but dangerous, and become far more common with High-Sec connections.
Identification
Show Info
The most straightforward method of identifying wormholes is simply selecting one on grid and clicking "Show Info". A window will appear giving you information about the wormhole in 4 sentences.
1. The first indicates what parts of space it would seem to lead to, there are more accurate ways to determine the destination, such as distinguishing between C1/C2/C3 wormholes or even determining what region of known space it connects to, however this is the simplest.
| Description | System Type |
|---|---|
| Unknown | C1/C2/C3 |
| Dangerous Unknown | C4/C5 |
| Deadly Unknown | C6 |
| High Security | Hisec |
| Low Security | Lowsec |
| Null Security | Nullsec |
| Triglavian Space | Pochven |
| Thera System | Thera |
2. The second indicates what stage of life the wormhole is currently at, while there are 4 different possibilities players generally split it into "Fresh" and "End of Life" (Or EOL) with EOL referring to a wormhole with less than 4 hours remaining. It is not suggested to enter end of life wormholes if you want to return the way you came as it is very easy to become trapped.
| Description | Remaining Time |
|---|---|
| not yet begun | more than 24 hours |
| beginning to decay | Between 4 and 24 hours |
| reaching the end | Less than 4 hours |
| dissipating into the ether | unverified, potentially less than 15 minutes |
3. The third indicates how much mass has destabilized this wormhole so far. Everything has mass including your ship and its contents, and every type of wormhole has different mass limits, any mass passing through a wormhole incrementally destabilizes it, until it reaches its limits. Some wormholes have very small mass limits, some very large, some even regenerate stability over time. This won't tell you a number, just how much in comparison to the wormholes max that has passed through, wormholes that are very unstable from mass are likely being "rolled" where someone goes back and forth through a wormhole to force it to close.
| Description | Mass to Limit Ratio |
|---|---|
| not yet had its stability significantly disrupted | less than 50% |
| beginning to decay | between 50% and 90% |
| reaching the end | more than 90% |
4. The last indicates what size ships can enter this wormhole
| Description | Ship Limits |
|---|---|
| Very large ships | Everything except for Titans and Supercarriers |
| Larger ships | Battleships, Orcas, and smaller |
| Up to medium size ships | Unplated Nestors, Battlecruisers and smaller |
| Only the smallest ships | Frigates, destroyers, and certain Heavy Interdiction Cruiser fits |
Visual Identification
The videos in this section were linked with the kind permission of their owner, Sothis Ast, owner of the whtype website.
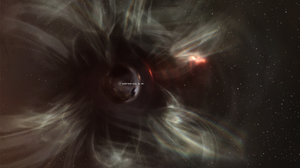
The visual aspect of a wormhole provides information that enable a pilot to complete the "show info" details, which is particularly interresting when looking at an exit (K162). To do that, one has to look at the two parts of the hole : its "eye" (the wobbly bubble in the center) and its aurora (its arms) :
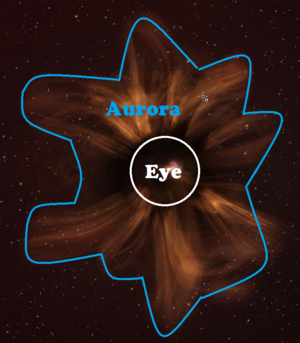
Destination system
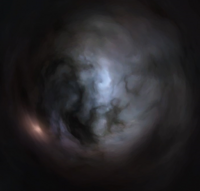
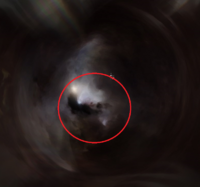
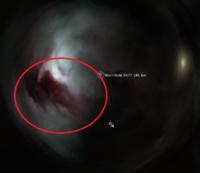
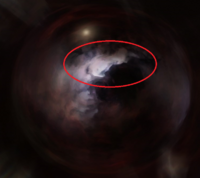
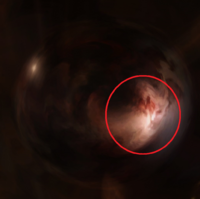
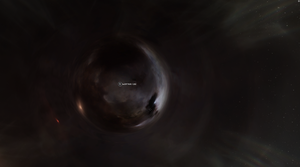
This information can be gathered when looking at the eye of the wormhole. The eye of the wormhole reflects the landscape of the region you'll end in when jumping through. Here are their various aspects and a few additional clues to know what to look for when you look a wormhole in its eye !
Jumping to W-Space
Jumping to K-Space
High-Sec and Low-Sec
As the eye is a reflection of the skybox of the system you'll land in, when jumping to High-sec or Low-Sec, its color will hint at the empire ruling the system.
Null-sec
When jumping into Null-sec, your only clue is the look of the clouds and your own knowledge of NS systems to recognize them. You can try to find the region by using the very well made "Modern Guide to Wormhole Identification" website
Maximum size allowed to jump through
This information is given by the color of the arms moving around the wormhole.
| Size | Visual | Ships able to jump through |
|---|---|---|
| Up to destroyers with the addition of Porpoise and HIC (with specific fit) | ||
| Up to battlecruisers | ||
| Up to Battleships | ||
| All ships with the exception of Titans and Supercarriers |
Health of the wormhole
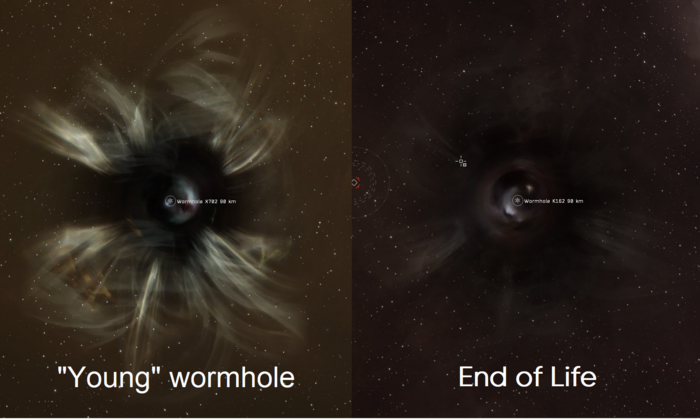
End of Life
As the wormhole ages, its aurora will fade and its movements will slow down and the eye become "wobblier".
Mass destabilization
As ships jump through, the size of the eye will shrink. Unfortunately, in empty space, there is no object of reference to compare the size of the eye to, so this is very hard to spot. It is generally visible if witnessing the moment when the size changes as a ship goes through and the wormhole's information is the quickest source of information available.
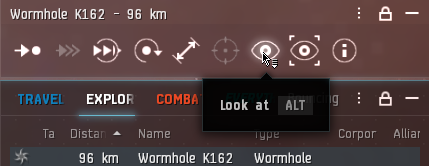
But if you use the "Look At" function when you select the wormhole in your overview, you'll set your point of view at a fixed distance and then you'll be able to notice how unusually small the "eye" of the wormhole appears to be on your screen as long, as you do not zoom in or out.
Wormhole Types
Unknown Space - Class 1-3
Dangerous Unknown Space - Class 4 and 5
Deadly Unknown Space - Class 6
Bookmarking Exits
Thera
Thera is the largest system in Anoikis. It has a unique distinction of being the only wormhole system with NPC stations owned by The Sanctuary corporation, a research branch of Servant Sisters of EVE. One of those stations, The Sanctuary Institute of Paleocybernetics, located near Thera XII planet hosts Signal Cartel headquarters.
Thera is highly connected to known space and can be used by adventurous or well-prepared pilots as a shortcut for traveling between New Eden regions. Signal Cartel's Thera Scanning service maintains a map of wormhole connections to Thera which can be used to plan the route.
There are several landmarks that have remnants of space constructions abandoned by previous Thera explorers. An activated CovOps cloaking device is recommended for sightseers who want to visit them as those sites are patrolled by Sleeper vessels.
